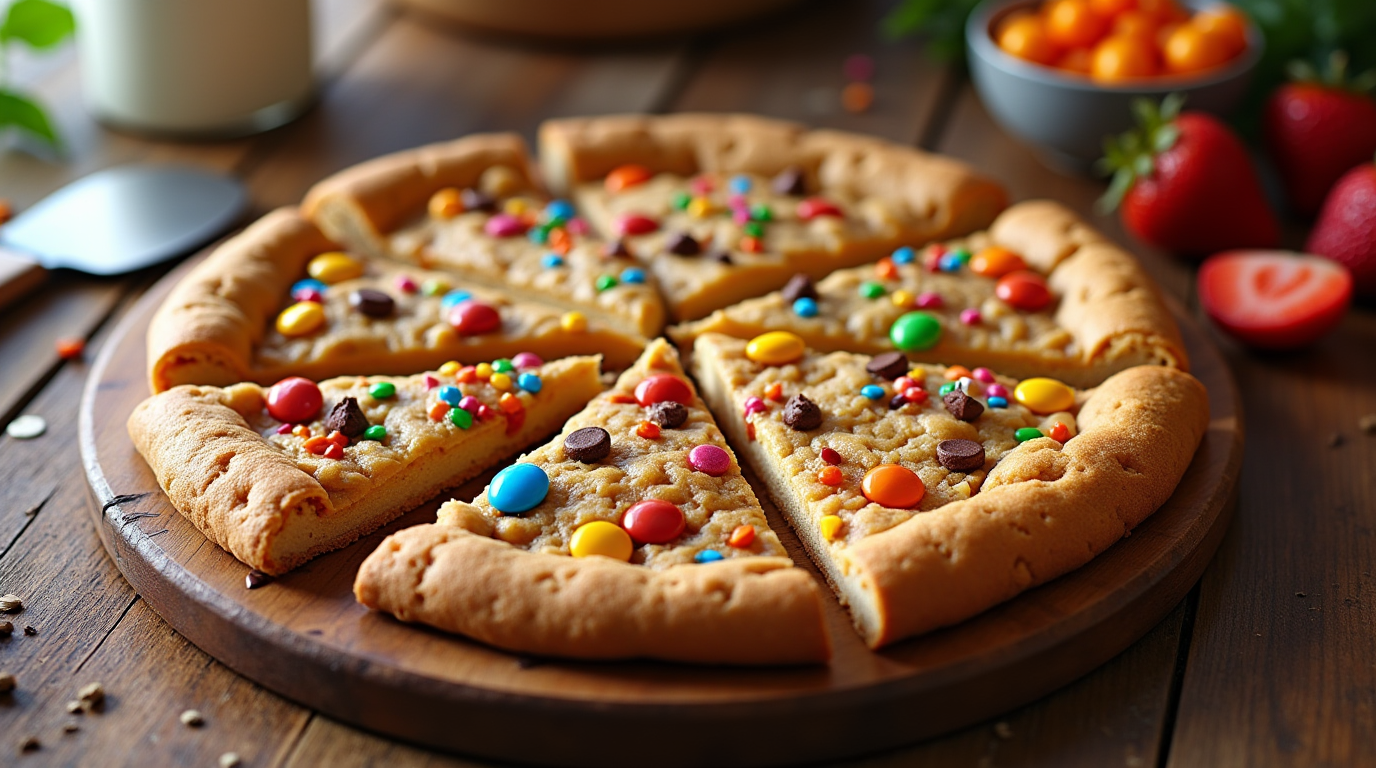
Easy Cookie Pizza That’s Simply Too Good to Miss
Have you ever had a desire for a dessert that is as much fun to prepare as it is to consume? The delicious treat you’ve been craving could be this simple cookie pizza! It’s the most adaptable treat for any occasion. Imagine a huge, chewy cookie topped with your favorite chocolates, sweets, or even fresh fruit. Cookie pizza is sure to please everyone, whether you’re serving it at a party, baking with the kids, or just treating yourself. It’s incredibly tasty, adaptable, and quick. Let’s get started and fulfill your dessert fantasies!
Table of Contents
Key Benefits of Easy Cookie Pizza
This Cookie isn’t just a dessert, it’s a celebration of creativity and flavor! Here are the key reasons why this easy, crowd-pleasing treat deserves a spot in your baking rotation:
1. Simple and Quick
- With minimal ingredients and straightforward steps, cookie pizza is perfect for bakers of all skill levels. From mixing the dough to decorating, the entire process is a breeze.
2. A Customizable Dessert
- Cookie pizza is like a blank canvas for your sweet cravings. Top it with candies, sprinkles, chocolate chips, or even fresh fruit, whatever makes your taste buds happy!
3. A Fun Activity for All Ages
- Whether you’re baking with kids, hosting a party, or simply treating yourself, decorating a this cookie is pure fun. For a unique touch, let everyone add their preferred toppings.
4. Perfect for Any Occasion
- Birthdays, holidays, or casual get-togethers; is a versatile dessert that fits every celebration. It’s a unique centerpiece that sparks conversations and smiles.
5. Easy to Share
- Sliced like a traditional pizza, this dessert is easy to serve and share with a crowd. It’s great for potlucks, school events, or family movie nights.
Cookie pizza is the ultimate combination of simplicity, creativity, and deliciousness. Let’s get started and bring this delightful dessert to life!
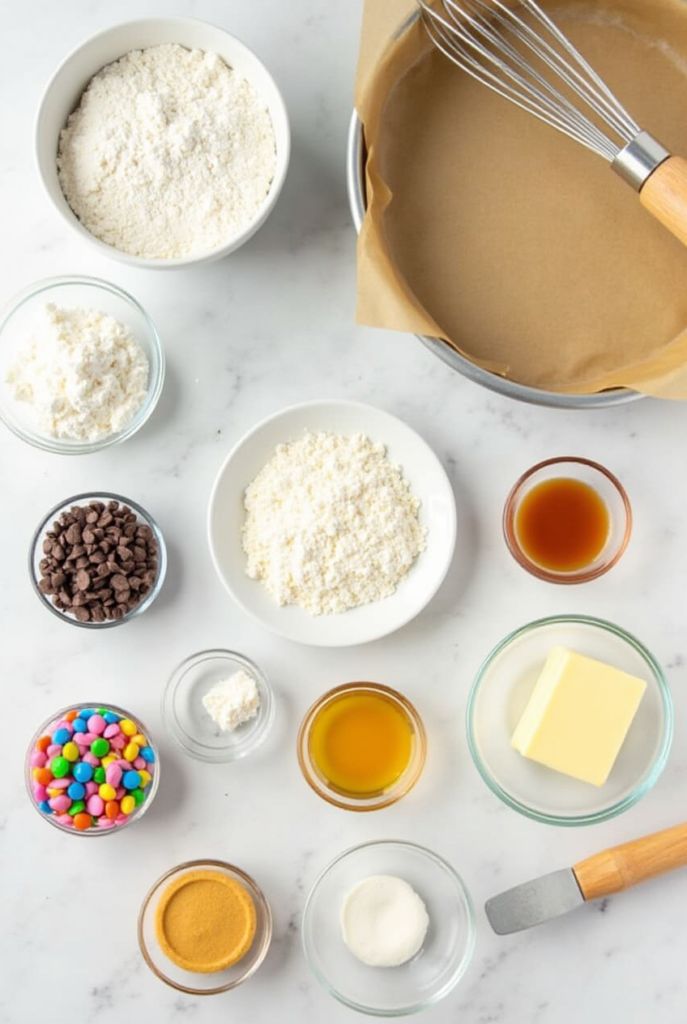
Ingredients for Easy Cookie Pizza
Here’s everything you’ll need to create a delicious cookie. I’ve broken the ingredients into categories to make it easier for you to gather and prepare them:
Cookie Base
- 1 cup all-purpose flour
- ½ teaspoon baking soda
- ¼ teaspoon salt
- ½ cup unsalted butter (softened)
- ½ cup granulated sugar
- ¼ cup brown sugar (packed)
- 1 large egg
- 1 teaspoon vanilla extract
Toppings
- ½ cup chocolate chips (milk, dark, or white)
- ¼ cup colorful candies (e.g., M&Ms, Skittles)
- 2–3 tablespoons sprinkles
- ¼ cup crushed cookies or pretzels (optional)
- Fresh fruit slices (strawberries, bananas, or kiwi for a refreshing twist)
Optional Drizzles
- 2 tablespoons chocolate sauce
- 1 tablespoon caramel syrup
Ingredient Tips
- Butter: To make combining easier, make sure it’s softened to room temperature.
- Brown Sugar: Adds a rich, chewy texture to the cookie base—don’t skip it!
- Toppings: Use your favorites or mix and match for endless flavor combinations.
With these ingredients ready, you’re set to bake a cookie that’s as fun to make as it is to eat. Let’s move on to bringing it all together!
How to Make Easy Cookie Pizza
Making this cookie is as easy and fun as it sounds! Just follow these step-by-step instructions, and you’ll have a delicious, crowd-pleasing treat in no time.
Step 1: Preheat Your Oven
- Preheat your oven to 350°F (175°C).
- Line a pizza pan or a round baking tray with parchment paper to prevent sticking.
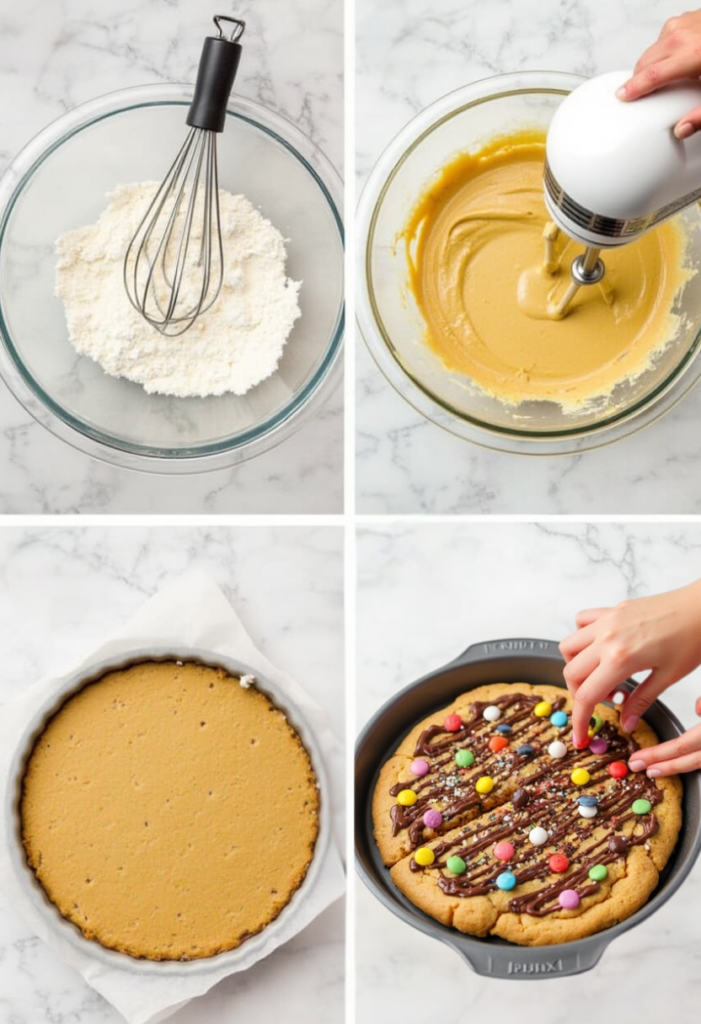
Step 2: Prepare the Cookie Dough
- Mix the Dry Ingredients:
- Mix the flour, baking soda, and salt in a medium-sized bowl. Put aside.
- Cream the Butter and Sugars:
- Beat the brown sugar, granulated sugar, and melted butter in a big bowl until light and fluffy, about 2 minutes.
- Add the Wet Ingredients:
- Add the egg and vanilla essence and beat until thoroughly blended.
- Combine the Wet and Dry Ingredients:
- Stirring just until mixed, gradually add the dry mixture to the wet components. Avoid overmixing to keep the dough soft.
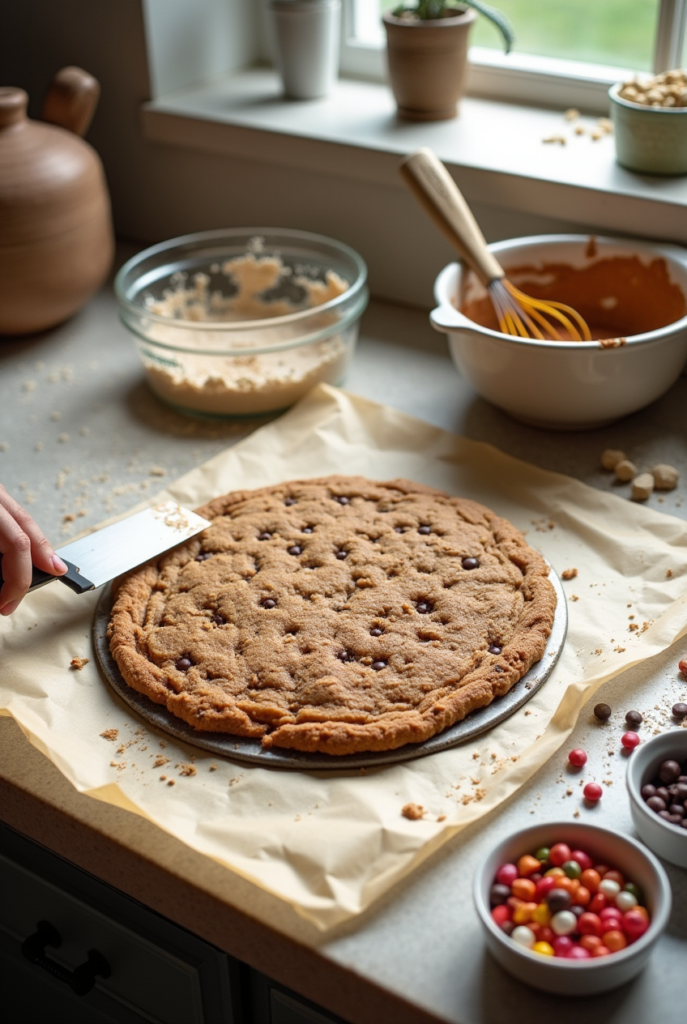
Step 3: Shape and Bake the Cookie Base
- Spread the Dough:
- Transfer the dough onto the prepared pizza pan. Use a spatula or your hands to spread it evenly into a large circle about ¼ inch thick.
- Bake:
- Place the pan in the oven and bake for 12–15 minutes, or until the edges are golden brown.
- Remove from the oven and let the cookie base cool completely before adding toppings.
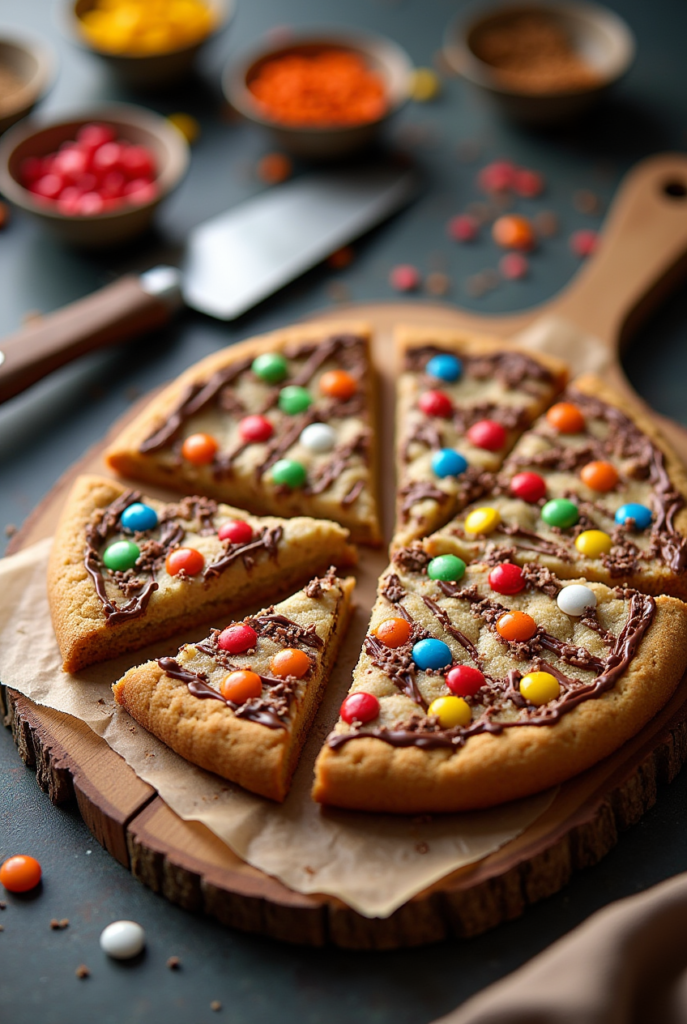
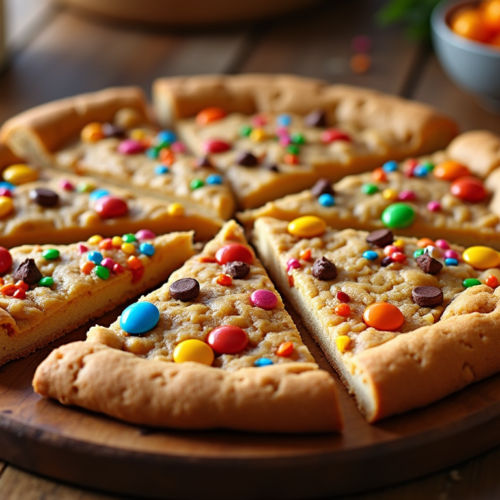
Step 4: Decorate Your Cookie Pizza
- Add Toppings:
- Spread an even layer of chocolate sauce or caramel syrup over the cooled cookie base.
- Sprinkle with chocolate chips, candies, sprinkles, or any of your favorite toppings.
- Optional Fresh Fruit:
- Add slices of strawberries, bananas, or kiwi for a refreshing twist.
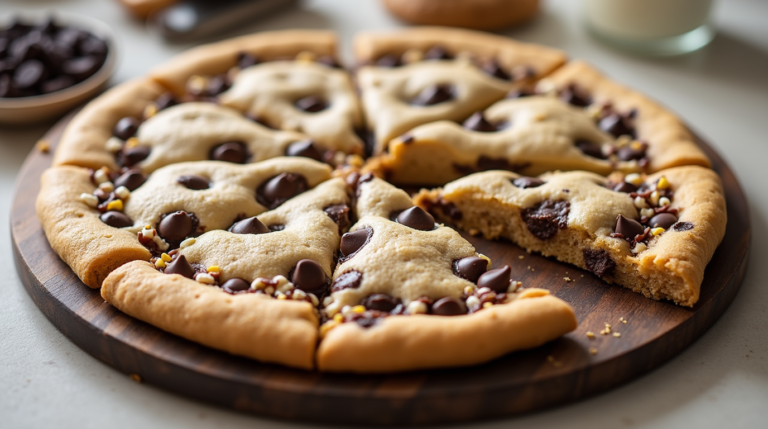
Step 5: Slice and Serve
- Use a pizza cutter to slice your cookie into wedges, just like a traditional pizza. Serve immediately and enjoy the fun and delicious treat!
Pro Tips and Variations for Easy Cookie Pizza
Making it is already simple, but with a few tips and creative twists, you can make it truly extraordinary. Here are some expert insights and fun ideas to help you customize your dessert to perfection:
Pro Tips for Success
- Use a Pizza Pan for Perfect Shape
- A non-stick pizza pan ensures your cookie bakes evenly and maintains its round shape. If you don’t have one, a standard baking sheet works too, just shape the dough into a circle by hand.
- Don’t Overbake
- While baking, keep an eye on the cookie foundation. Remove it from the oven when the edges are golden brown, even if the center looks slightly soft—it will firm up as it cools.
- Cool Completely Before Decorating
- Let the cookie base cool to room temperature to prevent toppings like frosting or chocolate sauce from melting.
- Distribute Toppings Evenly
- Spread your toppings to the edges for a visually appealing and delicious slice in every bite.
- Make Cleanup Easy
- Line your pan with parchment paper or a silicone baking mat to avoid sticking and simplify cleanup.
Creative Variations to Try
- Flavor Twist for the Cookie Base
- Add 2 tablespoons of cocoa powder for a chocolate cookie base.
- Replace vanilla extract with almond or maple extract for a unique flavor.
- Seasonal Toppings
- For holidays, customize the toppings with seasonal sprinkles or candies. For example, red and green sprinkles for Christmas or pastel candies for Easter.
- Healthier Options
- Use whole wheat flour or a gluten-free flour blend for a more nutritious base. Top with fresh fruits like blueberries, raspberries, or sliced peaches for a refreshing and lighter option.
- Kid-Friendly Fun
- Create a DIY cookie pizza station where kids can decorate their slices with their favorite toppings. It’s a hit for birthday parties or family get-togethers!
- Drizzle Magic
- Add artistic drizzles of melted white chocolate, peanut butter, or caramel sauce for extra flair.
- Mini Cookie
- Divide the dough into smaller portions and bake individual cookie. These are perfect for single servings or party favors.
Storage and Leftovers
- Store leftover cookie pizza in an airtight container at room temperature for up to 3 days.
- To keep it fresher for longer, refrigerate it and allow it to come to room temperature before serving.
With these tips and variations, it can be as creative or classic as you’d like. Whether you’re baking for a party, a family dessert night, or just a fun activity, these ideas will ensure your cookie stands out every time!
Serving Suggestions for Easy Cookie Pizza
Is a versatile dessert that’s perfect for any occasion. Whether you’re enjoying it at home or sharing it with friends, these serving ideas will help you make the most of this delicious treat:
1. Slice It Like a Pizza
- Use a pizza cutter to slice the cookie into classic triangular wedges. It’s an easy and fun way to serve this dessert while maintaining its pizza-like charm.
2. Pair It with Ice Cream
- Top each slice with a scoop of vanilla or chocolate ice cream for an indulgent combination of warm and cold flavors.For added luxury, sprinkle with chocolate syrup.
3. Make it a Party Centerpiece
- Arrange the cookie pizza on a large serving platter surrounded by small bowls of extra toppings like sprinkles, crushed nuts, or mini candies. Let guests add their favorite extras to their slices.
4. Serve with Coffee or Milk
- Pair this dessert with a cup of hot coffee or a glass of cold milk for a classic pairing that everyone loves. It’s ideal for a casual dessert or an afternoon treat.
5. Customize for Celebrations
- Use themed toppings to match special occasions. For example, red and pink candies for Valentine’s Day, pastel sprinkles for Easter, or orange and black decorations for Halloween.
6. Create Mini Serving Options
- If you’ve made mini cookie, serve them as individual portions. Add a dollop of whipped cream on top for a cute and delicious presentation.
7. Sweet and Salty Pairings
- Add a few salty snacks like pretzels or popcorn on the side to balance out the sweetness of the cookie pizza. It’s a hit for movie nights or casual gatherings.
Storage Tip
- Leftover cookie pizza can be stored in an airtight container at room temperature for up to 3 days. Reheat slices briefly in the oven for a fresh-from-the-oven taste.
These serving suggestions ensure your cookie pizza is a show-stopping dessert that’s as enjoyable to present as it is to eat. Get creative and let it shine at your next celebration or family night!
Conclusion
Cookie pizza is more than just a dessert; it’s a fun and creative experience that brings people together. Whether you’re baking with kids, hosting a party, or simply treating yourself, this dessert is guaranteed to impress. Its chewy cookie base and endless topping possibilities make it a crowd-pleaser for any occasion.
What makes it even better? It’s quick, customizable, and so easy to make! With a few simple ingredients and tools, you can create a dessert that looks as good as it tastes. From colorful candies to fresh fruit, the decoration options are endless, letting you tailor it to your unique style and preferences.
The joy of slicing into this cookie masterpiece and sharing it with friends and family is unmatched. It’s a dessert that sparks smiles, conversations, and sweet memories. So, grab your ingredients, preheat the oven, and let your creativity shine. Your perfect cookie awaits. Happy baking!
cookie pizza
Ingredients
Cookie Base
- 1 cup all-purpose flour
- ½ teaspoon baking soda
- ¼ teaspoon salt
- ½ cup unsalted butter softened
- ½ cup granulated sugar
- ¼ cup brown sugar packed
- 1 large egg
- 1 teaspoon vanilla extract
Toppings
- ½ cup chocolate chips milk, dark, or white
- ¼ cup colorful candies e.g., M&Ms, Skittles
- 2 –3 tablespoons sprinkles
- ¼ cup crushed cookies or pretzels optional
- Fresh fruit slices strawberries, bananas, or kiwi for a refreshing twist
Optional Drizzles
- 2 tablespoons chocolate sauce
- 1 tablespoon caramel syrup
Instructions
Step 1: Preheat Your Oven
- Preheat your oven to 350°F (175°C).
- Line a pizza pan or a round baking tray with parchment paper to prevent sticking.
Step 2: Prepare the Cookie Dough
- Mix the Dry Ingredients:
- Mix the flour, baking soda, and salt in a medium-sized bowl. Put aside.
- Cream the Butter and Sugars:
- Beat the brown sugar, granulated sugar, and melted butter in a big bowl until light and fluffy, about 2 minutes.
- Add the Wet Ingredients:
- Add the egg and vanilla essence and beat until thoroughly blended.
- Combine the Wet and Dry Ingredients:
- Stirring just until mixed, gradually add the dry mixture to the wet components. Avoid overmixing to keep the dough soft.
Step 3: Shape and Bake the Cookie Base
- Spread the Dough:
- Transfer the dough onto the prepared pizza pan. Use a spatula or your hands to spread it evenly into a large circle about ¼ inch thick.
- Bake:
- Place the pan in the oven and bake for 12–15 minutes, or until the edges are golden brown.
- Remove from the oven and let the cookie base cool completely before adding toppings.
Step 4: Decorate Your Cookie Pizza
- Add Toppings:
- Spread an even layer of chocolate sauce or caramel syrup over the cooled cookie base.
- Sprinkle with chocolate chips, candies, sprinkles, or any of your favorite toppings.
- Optional Fresh Fruit:
- Add slices of strawberries, bananas, or kiwi for a refreshing twist.
Step 5: Slice and Serve
- Use a pizza cutter to slice your cookie pizza into wedges, just like a traditional pizza. Serve immediately and enjoy the fun and delicious treat!
Notes
Pro Tips for Success
- Use a Pizza Pan for Perfect Shape
- A non-stick pizza pan ensures your cookie pizza bakes evenly and maintains its round shape. If you don’t have one, a standard baking sheet works too, just shape the dough into a circle by hand.
- Don’t Overbake
- While baking, keep an eye on the cookie foundation. Remove it from the oven when the edges are golden brown, even if the center looks slightly soft—it will firm up as it cools.
- Cool Completely Before Decorating
- Let the cookie base cool to room temperature to prevent toppings like frosting or chocolate sauce from melting.
- Distribute Toppings Evenly
- Spread your toppings to the edges for a visually appealing and delicious slice in every bite.
- Make Cleanup Easy
- Line your pan with parchment paper or a silicone baking mat to avoid sticking and simplify cleanup.
Creative Variations to Try
- Flavor Twist for the Cookie Base
- Add 2 tablespoons of cocoa powder for a chocolate cookie base.
- Replace vanilla extract with almond or maple extract for a unique flavor.
- Seasonal Toppings
- For holidays, customize the toppings with seasonal sprinkles or candies. For example, red and green sprinkles for Christmas or pastel candies for Easter.
- Healthier Options
- Use whole wheat flour or a gluten-free flour blend for a more nutritious base. Top with fresh fruits like blueberries, raspberries, or sliced peaches for a refreshing and lighter option.
- Kid-Friendly Fun
- Create a DIY cookie pizza station where kids can decorate their slices with their favorite toppings. It’s a hit for birthday parties or family get-togethers!
- Drizzle Magic
- Add artistic drizzles of melted white chocolate, peanut butter, or caramel sauce for extra flair.
- Mini Cookie Pizzas
- Divide the dough into smaller portions and bake individual cookie pizzas. These are perfect for single servings or party favors.
Storage and Leftovers
- Store leftover cookie pizza in an airtight container at room temperature for up to 3 days.
- To keep it fresher for longer, refrigerate it and allow it to come to room temperature before serving.
FAQs
1. Can I make the cookie dough ahead of time?
Yes, you can prepare the dough in advance! Store it in the refrigerator for up to two days after carefully wrapping it in plastic wrap. When ready to bake, let it come to room temperature for easier spreading.
2. What toppings work best?
The possibilities are endless! Popular options include:
Chocolate chips or chunks
Mini candies like M&Ms
Fresh fruit slices (strawberries, bananas, kiwi)
Crushed cookies or pretzels for added texture
A drizzle of caramel or chocolate sauce
3. How do I store leftover cookie pizza?
Keep leftovers for up to three days at room temperature in an airtight container. If you’ve used fresh fruit, refrigerate to keep the toppings fresh.
4. Can I make this recipe gluten-free?
Absolutely! Use a 1:1 gluten-free flour blend in place of all-purpose flour, and ensure all your toppings are gluten-free. The cookie pizza will still be soft, chewy, and delicious.
5. Can I freeze cookie pizza?
Indeed! Wrap each slice in plastic wrap, freeze it, and then put it in a freezer-safe bag. To enjoy, thaw at room temperature or reheat briefly in the oven for a freshly baked taste.
6. What’s the best way to prevent overbaking?
Keep an eye on the cookie pizza while it bakes. Remove it from the oven when the edges turn golden brown but the center still looks slightly soft. As it cools, it will keep getting firmer.
7. How can I make this recipe dairy-free?
Swap the butter for a plant-based alternative and use dairy-free chocolate or toppings. Substitute Greek yogurt with a non-dairy yogurt if needed.
8. Can I make mini cookie pizzas instead of one large pizza?
Yes! Divide the dough into smaller portions and bake them individually. Mini cookie pizzas are great for personal servings or party platters.
These FAQs cover everything you need to know to make, store, and customize your cookie pizza. Please feel free to comment below if you have any other queries. Happy baking and enjoy your delicious creation!
Loved It? Let Us Know!
There are no reviews yet. Be the first one to write one.


One Comment
Comments are closed.